When your garage door does not work properly then the spring is probably broken. After years of working in garage door spring replacement, I can confidently declare that a spring which is failing is not only inconvenient, it is also dangerous. As a homeowner or a DIYer, you need to know how to tackle this problem without letting it be harmful.
This step-by-step guide is based on real-world experience to assist you to repair a broken garage door spring efficiently and securely. You are trying to fix the garage door spring by yourself and simply need one source of information on how-to-do-it or want to know what goes on, then this article will take you through the whole process with expert knowledge and hands-on expertise.
What is a Garage Door Spring?
One essential component of any garage door system is a garage door spring. It counterbalances the weight of the door, making it possible to open and close with minimal effort.
| Spring Type | Location | Replacement Complexity | Common Uses | Key Notes | Life Expectancy |
|---|---|---|---|---|---|
| Torsion Spring | Above the door on a torsion bar | High | Heavier doors, commercial installations | Requires winding bars and precise tensioning | ~10,000 cycles |
| Extension Spring | Along the door’s side cables | Moderate | Lighter residential doors | Safer, but still stores significant force | ~5,000–7,000 cycles |
We’ll begin with garage door torsion spring replacement, as it's the more complex of the two, and cover extension spring replacement afterward.
Why Garage Door Springs Fail?
Garage door springs are constantly under extreme pressure and might wear out due to age, rust, or a lack of maintenance.
Signs of a Broken Garage Door Spring
Before attempting a garage door spring replacement, confirm the problem. Look for these common signs:
- Loud bang from the garage (spring snapping)
- Garage door won’t open or only lifts a few inches
- Visible gap in the spring coil
- Uneven or jerky door movement
- Loose or slack cables
If you notice any of these symptoms, stop using the door immediately—continuing operation can cause further damage or injury.
Safety First: How to Safely Replace a Garage Door Spring?
Replacing garage door springs can be dangerous. DIY spring repair should only be attempted if you have mechanical skills, safety tools, and a clear understanding of the Garage Door Replacement process.
Always follow these precautions:
- Make sure the door is completely closed and turn off the garage door opener's electricity.
- Wear heavy-duty gloves, safety glasses, and steel-toe footwear.
- Use proper winding bars (never screwdrivers) for torsion springs.
- Clamp the garage door track to prevent unexpected movement.
Torsion springs store intense torque and can cause serious injury if mishandled.
Tools and Materials for Garage Door Spring Replacement
| Item | Purpose |
|---|---|
| Winding bars (2) | Safely wind/unwind torsion springs |
| C-clamps or locking pliers | Secure the door in a fixed position |
| Adjustable wrench & sockets | Remove/install bolts and hardware |
| Tape measure | Measure spring dimensions accurately |
| Stepladder | Access torsion bar and hardware |
| Replacement torsion springs | Must match original specs exactly |
| Safety goggles & gloves | Personal protection |
Warning: Replacing garage door springs is dangerous. If you're not confident or lack proper tools, hire a professional.
Step-by-Step Guide to Replacing a Torsion Spring
This guide follows professional standards for safe and effective spring replacement:
Step 1: Measure the springs
Carefully measure the old spring:
- Wire diameter
- Outer diameter
- Overall length
- Wind direction (right or left)
This ensures you order an exact match for safe operation.
Step 2: Release Tension
- Use C-clamps on the track or locking pliers to secure the garage door in position.
- Put the winding bars into the spring's winding cone.
- Slowly unwind the spring in quarter turns. Hold firmly—this step carries the highest risk.
Step 3: Remove the Old Springs
- Loosen the set screws on the torsion cone.
- Slide the spring off the shaft, taking note of the drum and cable placement.
Step 4: Install the New Springs
- Slide the new spring onto the torsion shaft.
- Securely tighten the set screws after positioning the stationary cone against the center bracket.
Step 5: Wind the New Springs
- Use winding bars to wind the springs the correct number of turns (based on door height).
- Alternate bar positions and keep a firm grip.
- Tighten set screws once winding is complete.
Step 6: Test Balance
- Manually lift the garage door halfway.
- A properly balanced door should stay in place without drifting. If not, you may need a minor tension adjustment.
Step 7: Reconnect the Opener
- Remove clamps or pliers.
- Reconnect power and test the automatic opener.
- Listen for odd noises or friction and adjust close-force/travel limits if necessary.
Step-by-Step Guide to Replace Extension Springs
This method is safer but still requires caution.
- Secure the garage door in the closed position.
- Disconnect extension springs from one end using pliers.
- Attach new springs while keeping cable tension steady.
- Check the alignment of the cables through the pulley system.
- Test garage door movement and make minor adjustments as needed.
Garage Door Spring Replacement Cost
| Service Type | Estimated Cost |
|---|---|
| DIY (parts only) | $30 – $100 per spring |
| Professional single spring repair | $150 – $250 |
| Double spring replacement | $200 – $400 |
Prices vary depending on spring quality, door size, and your location. Always compare quotes from multiple providers.
Garage Door Spring Maintenance Tips
Your springs' lifespan is increased and expensive repairs are avoided with proper maintenance.
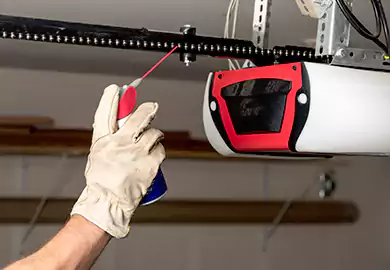
- Lubricate springs every 3–4 months with garage door lubricant
- Inspect cables and pulleys regularly for wear or fraying
- Tighten loose bolts and brackets
- Schedule annual professional inspections
When to Call a Professional
Even with a reliable guide, some situations call for expert help. Contact a certified technician if:
- You don’t have the right tools
- The garage door is extremely heavy or misaligned
- You’re unsure of the spring type or installation steps
Professionals can safely complete the job and fine-tune all mechanical components.
DIY vs. Hiring a Pro: A Quick Comparison
| Factor | DIY | Professional Service |
|---|---|---|
| Cost | Lower (just materials/tools) | Higher (labor + parts) |
| Safety | High risk without experience | Low risk with trained technician |
| Time | 2–4 hours | Usually under 1 hour |
| Tools Required | Specialized tools needed | Provided by technician |
Avoid taking chances and consult an expert when in doubt.
Final Thoughts
A garage door spring replacement is a challenging but profitable DIY project. By following this step-by-step guide, using proper safety practices, and maintaining your system regularly, you’ll ensure smooth, safe garage door operation for years to come.
If at any point you're unsure or face unexpected problems—like alignment issues or cable damage—it’s always best to consult a professional technician to avoid serious risk.